Github
Github
This connector enables AI agents and RAG systems to retrieve context from Github through Airweave’s unified search layer.
Configuration
GitHub source connector integrates with the GitHub REST API to extract and synchronize data.
Connects to your GitHub repositories.
It supports syncing repository metadata, directory structures, and code files with configurable filtering options for branches and file types.
Authentication
Supported authentication methods:
- Direct Credentials
- Auth Provider
Configuration Options
This connector does not have any additional configuration options.
Data Models
The following data models are available for this connector:
GitHubRepositoryEntity
Schema for GitHub repository entity.
GitHubDirectoryEntity
Schema for GitHub directory entity.
GitHubCodeFileEntity
Schema for GitHub code file entity.
GitHubPullRequestEntity
Schema for a merged GitHub pull request.
Reference: https://docs.github.com/en/rest/pulls/pulls?apiVersion=2022-11-28
GitHubPRCommentEntity
Schema for a review comment on a GitHub pull request.
Review comments are anchored to specific lines in the diff.
Reference: https://docs.github.com/en/rest/pulls/comments?apiVersion=2022-11-28
GithubRepoEntity
Schema for a GitHub repository (alternative schema).
References: https://docs.github.com/en/rest/repos/repos?apiVersion=2022-11-28
Note: This is an alternative repository entity schema. Consider using GitHubRepositoryEntity.
GithubContentEntity
Schema for a GitHub repository’s content (file, directory, submodule, etc.).
References: https://docs.github.com/en/rest/repos/contents?apiVersion=2022-11-28
Note: This is a generic content entity. Consider using specific entities like GitHubCodeFileEntity or GitHubDirectoryEntity.
GitHubFileDeletionEntity
Schema for GitHub file deletion entity.
This entity is used to signal that a file has been removed from the repository and should be deleted from the destination.
Setting up a GitHub Personal Access Token for Airweave
To connect your GitHub repositories to Airweave, you’ll need to create a Personal Access Token (PAT) with the appropriate permissions. This guide walks you through the process of creating and configuring a fine-grained token for use with Airweave.
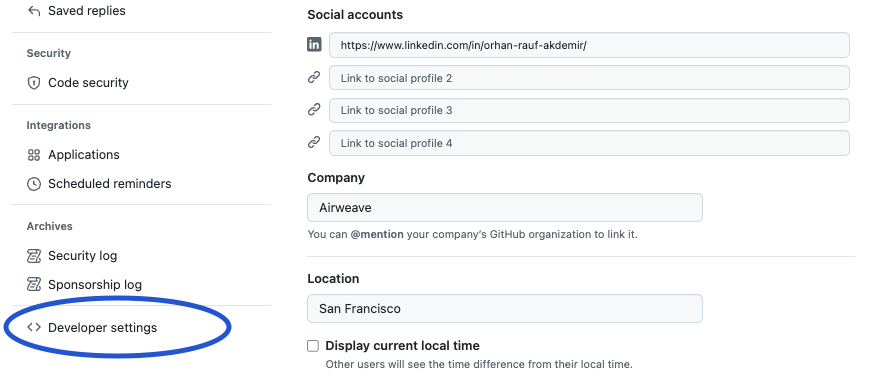
Step 1: Access Developer Settings in GitHub
Navigate to your GitHub account settings by clicking on your profile picture in the top right corner, then select “Settings”. From there, scroll down to find and click on “Developer settings” in the left sidebar.
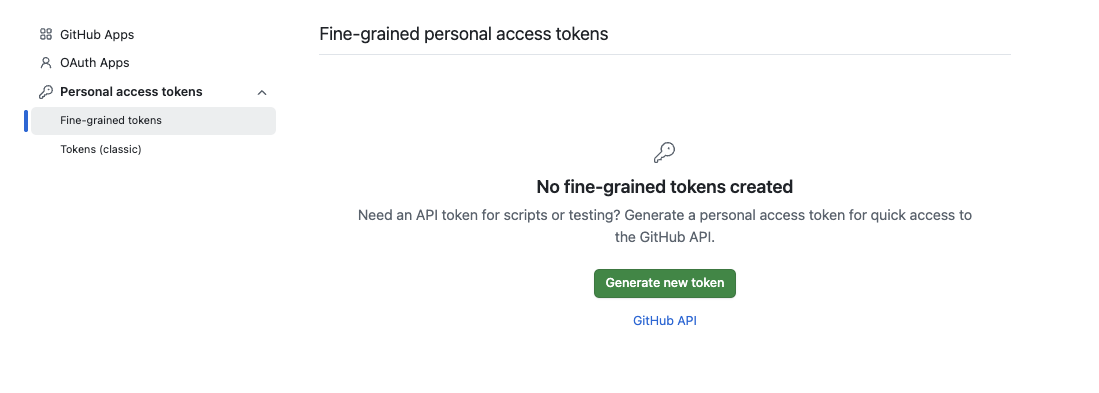
Step 2: Create a New Fine-Grained Token
In the Developer settings page, select “Fine-grained tokens” from the left menu, then click on “Generate new token”.
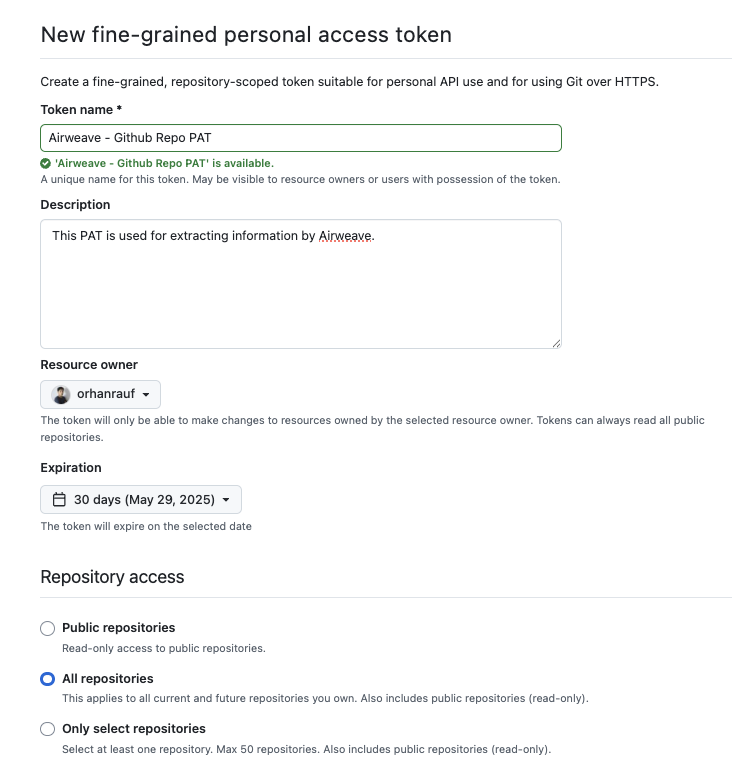
Step 3: Configure Your Token
Fill out the token form with the following details:
- Token name: Choose a descriptive name like “Airweave Integration”
- Expiration: Select an appropriate expiration date (recommended: 1 year for production use)
- Repository access: Choose either “All repositories” or select specific repositories you want to connect to Airweave
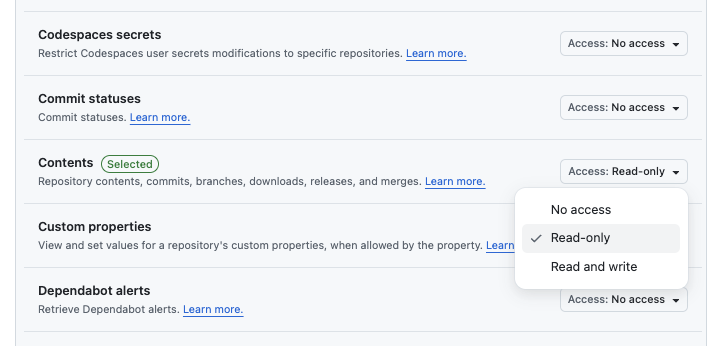
Step 4: Set Required Permissions
For the GitHub connector to work properly, you need to grant the following permissions:
Under “Repository permissions”:
- Set “Contents” to “Read-only” - This allows Airweave to read repository files
Step 5: Generate and Save Your Token
After configuring the permissions, scroll to the bottom of the page and click “Generate token”.
Important: GitHub will display your token only once. Make sure to copy and store it in a secure location, as you won’t be able to view it again.
Step 6: Add Your Token to Airweave
When setting up the GitHub connector in Airweave:
- Authentication: Paste your personal access token in the “Personal Access Token” field
- Configuration: Enter the repository name in the format
owner/repo(e.g.,airweave-ai/airweave) in the “Repository Name” configuration field
Your GitHub repository is now connected to Airweave and ready for synchronization.